Plasti Dip is a protective rubber coating you can use for literally countless purposes. You may have heard of this product being used for tools, vehicles or various other art projects, but what makes Plasti Dip so special? It is extremely versatile and allows you to protect your items or simply change the look of them at a very low cost and without having to risk damaging your item. Not only is it very versatile, it is also very easy to use and replace.
You may be wondering exactly how to apply Plasti Dip. Is it really as easy as they say? The answer is yes. Plasti Dip comes in spray cans just like spray paint, small dipping cans, or by the gallon for bigger dipping projects. As a general rule, you will need to apply a minimum of four coats. Depending on the item you’re ‘dipping,’ you may need up to 8 coats for complete coverage. This may seem like a lot, but it must be applied lightly in order to achieve a smooth, finished look without drips or streaks. Additionally, certain colors look better with a base coat underneath. For example, the Blaze colors will turn out brighter with a white base coat. Numerous coats are also necessary for easy removal when the time comes. On the plus side, it requires minimal drying time between coats, and it will last up to three years or more if you want.
The application process does not require any additional tools or equipment; however, depending on the project, you may want to tape off an area for easy cleanup. The only other preparation needed before dipping your item is cleansing. Plasti Dip must be applied to a clean, dry surface in order to stick properly. Once your item is ready, simply spray on, let dry, and repeat.
As with any project, you may benefit from some extra helpful tips. One thing I would recommend when beginning your Plasti Dip journey is to check out YouTube for examples of how others have done it. Watching a video on a project similar to yours may just make the difference between an average outcome and an exceptional one. This is also a great way to get fun new ideas of ways you can use your Plasti Dip colors.
For those who are in a hurry to get started, here are few things I learned from my own experiences. First of all, this stuff has a very strong smell, so you’ll want to be in a well ventilated area or even wear a face mask for your own protection. Avoid the outdoors if it’s very windy, as you don’t want to have dirt or other objects getting stuck to your item as your dip dries. Secondly, do not try to use Plasti Dip in extreme temperatures. If it gets too cold, it does not spray on evenly, and you may end up with some bubbles or drips where the dip came out a little too heavy. The ideal environment is room temperature with minimal humidity. Finally, if you are using a spray can, make sure you keep it shaken well as you apply it. This keeps the dip mixed so the color as well as consistency remains as it should, ensuring a nice evenly coated item. Follow these simple tips, and your project, whether it’s a wooden spoon from your kitchen or the wheels on your car, will look professionally done
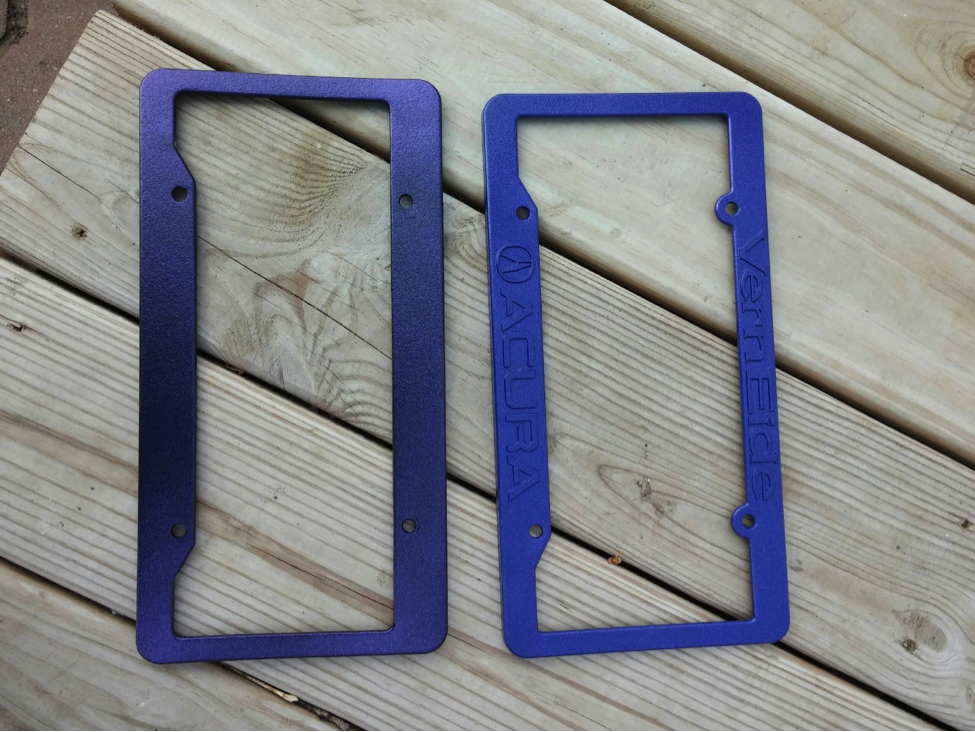
Figure 1 One black with purple metalizer; one Blurple with purple metalizer.
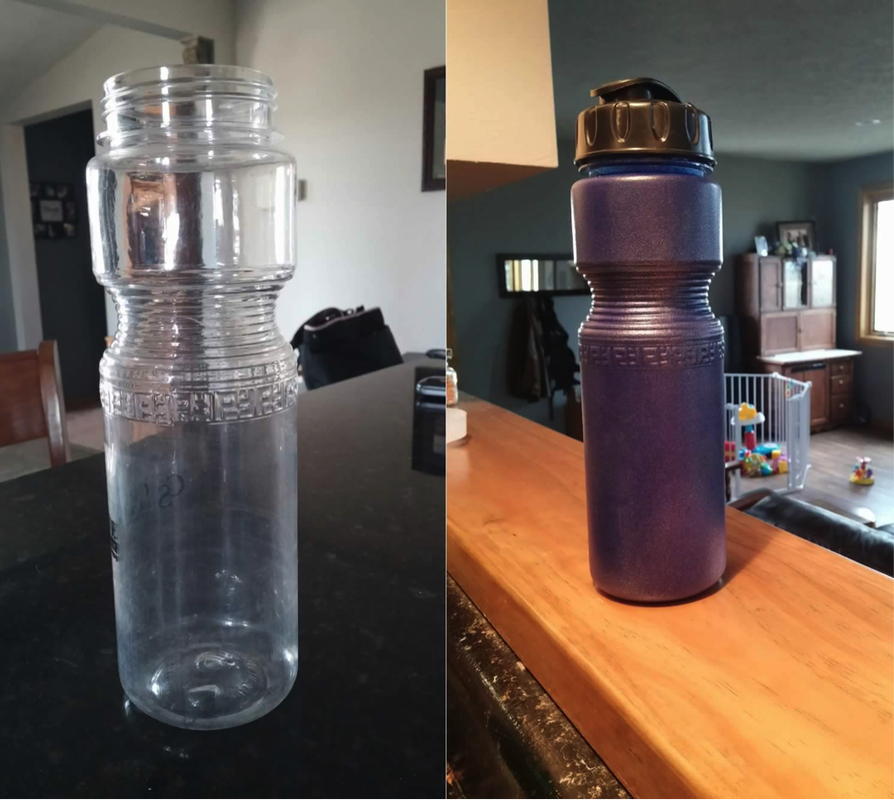
Figure 2 Before/After: black with purple metalizer.
As you can see from these Plasti Dip projects, you don’t have to spend big money or be a professional to give your item a new look. As an amateur ‘dipper,’ I was able to quickly and easily dip these items, and they turned out pretty nice. The possibilities really are endless with the various color and topcoat options available.
As you can see from these Plasti Dip projects, you don’t have to spend big money or be a professional to give your item a new look. As an amateur ‘dipper,’ I was able to quickly and easily dip these items, and they turned out pretty nice. The possibilities really are endless with the various color and topcoat options available.
 RSS Feed
